 Save
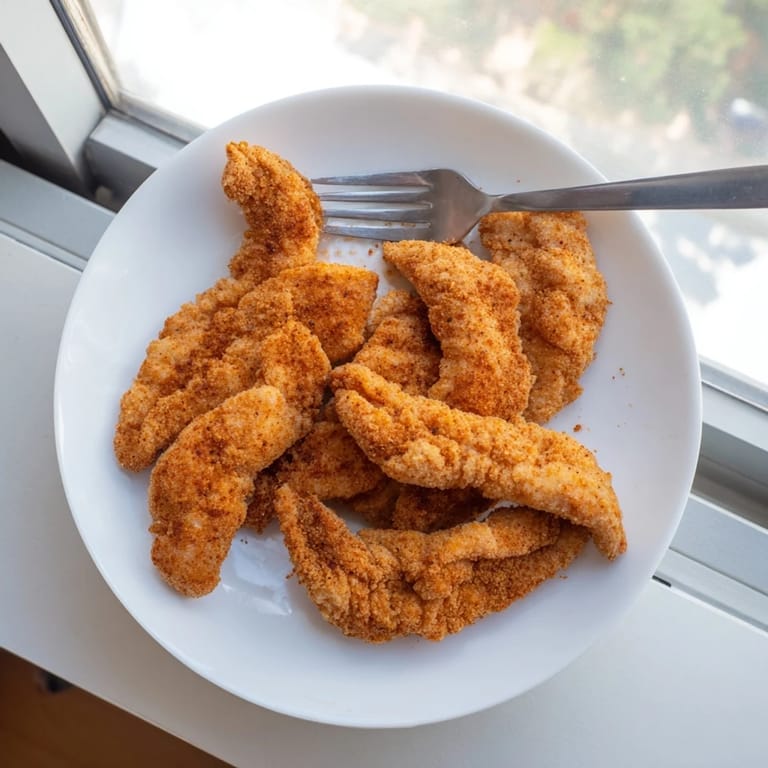
Save One thunderstorm-filled afternoon when my kids were bouncing off the walls, I pulled out chicken tenders on a whim. The sizzle of that first batch hitting hot oil somehow quieted the chaos instantly. Rain tapped against windows while we gathered around the stove, everyone suddenly patient as golden-brown pieces emerged from the pan. Something about that crispy exterior giving way to juicy meat created a moment of pure kitchen magic.
I first made these for my nephew who declared regular chicken nuggets dead to him after just one bite. His mom texted me three days later asking for the recipe because he wouldnt stop talking about them. Now whenever he visits, he marches straight to my refrigerator to check for buttermilk, his subtle way of requesting these tenders without having to ask directly.
Ingredients
- Buttermilk: I learned that real buttermilk not only tenderizes the chicken but creates these pockets of tang that make each bite more complex.
- Chicken tenders: Try to find ones of similar thickness so they cook evenly, or if using chicken breast, slice them against the grain for maximum tenderness.
- Baking powder: This tiny addition makes the coating extra bubbly and crisp, a trick I stumbled upon after a happy baking accident.
- Cayenne pepper: Just a touch wakes everything up without overwhelming, creating dimension rather than heat.
Tired of Takeout? 🥡
Get 10 meals you can make faster than delivery arrives. Seriously.
One email. No spam. Unsubscribe anytime.
Instructions
- Marinate with patience:
- Whisk buttermilk with salt, pepper, garlic and onion powder in a large bowl until combined. Submerge chicken tenders completely, cover the bowl, and refrigerate for at least an hour, though overnight creates magic.
- Create your coating station:
- In a shallow dish, mix flour, paprika, salt, black pepper, optional cayenne, and that secret baking powder. The shallow dish makes coating easier than a deep bowl.
- Heat your oil right:
- Bring oil to 350°F in a deep skillet or Dutch oven. If you dont have a thermometer, test with a pinch of flour that should bubble immediately but not burn.
- Dredge with purpose:
- Let excess marinade drip off each tender, then press firmly into the flour mixture on all sides. The pressing motion helps create those beautiful crispy ridges.
- Fry in batches:
- Gently lower 3-4 tenders into the hot oil, giving them plenty of space. Flip after about 4 minutes when golden brown, then cook another 4-5 minutes until perfectly done.
- Rest briefly:
- Transfer to paper towels and let rest for 2 minutes. This helps the coating set and the juices redistribute.
 Save
Save Last summer, my daughter and I made these for her end-of-year picnic. As we packed them into containers, still warm, she looked up and said, These smell like celebrations. Somehow that captured it perfectly, these arent just dinner, theyre little crispy vessels of joy that transform ordinary moments into something worth remembering.
The Double-Dip Secret
On a day when I was feeling particularly ambitious, I tried double-dipping the tenders, taking them from the first flour coating back into the buttermilk and then into the flour again. The result was this gloriously craggy exterior with these amazing crispy ridges that created twice the crunch. It takes a bit more time, but for special occasions, that extra step transforms these from great to unforgettable.
Perfect Pairing Ideas
These tenders have become my blank canvas for all sorts of dipping adventures. My personal favorite is mixing honey with a bit of hot sauce and butter for a sweet heat situation that makes the flavors pop. My husband swears by a quick homemade ranch with extra dill, while the kids keep it classic with honey mustard that has a touch of maple syrup for depth.
Making It Work For Everyone
When my sister discovered she had a gluten sensitivity, I refused to let her miss out on our family chicken tender nights. After some experimentation, I found that a mix of rice flour and cornstarch creates a coating that crisps up beautifully without wheat.
- For dairy-free needs, coconut milk with a tablespoon of lemon juice makes a surprisingly effective buttermilk alternative.
- Keep a digital thermometer nearby to maintain that perfect 350°F oil temperature for consistent results every time.
- Let the cooked tenders rest on a wire rack instead of paper towels if you want to maintain maximum crispiness all around.
 Save
Save These crispy treasures have a way of bringing people to the table with genuine excitement, no matter their age. Perhaps its because they connect us to simple pleasures, reminding us that sometimes the most memorable meals arent the fanciest, but the ones made with care and enjoyed together.
Recipe FAQs
- → How long should I marinate the chicken tenders?
Marinate for at least 1 hour in the refrigerator, though overnight marinating delivers the best flavor and tenderness. The buttermilk helps tenderize the meat while adding tangy depth.
- → What temperature should the oil be for frying?
Heat the oil to 175°C (350°F) for optimal results. This temperature ensures the coating becomes crispy and golden while the chicken cooks through without burning the exterior.
- → Can I make these chicken tenders spicier?
Yes, include the optional cayenne pepper in the coating mixture, or increase the amount to your preferred heat level. You can also add hot sauce to the buttermilk marinade for extra kick.
- → How do I get extra crispy chicken tenders?
Try the double-dip method: after the first flour coating, dip tenders back into the buttermilk, then coat with flour again. The baking powder in the coating also helps create extra crunch.
- → What dipping sauces pair well with these tenders?
Honey mustard, ranch dressing, barbecue sauce, and buffalo sauce are all excellent choices. The crispy, savory coating complements both creamy and tangy sauces beautifully.
- → How do I know when the chicken is fully cooked?
Use a cooking thermometer to check that the internal temperature reaches 75°C (165°F). The exterior should be golden brown, and juices should run clear when pierced.