 Save
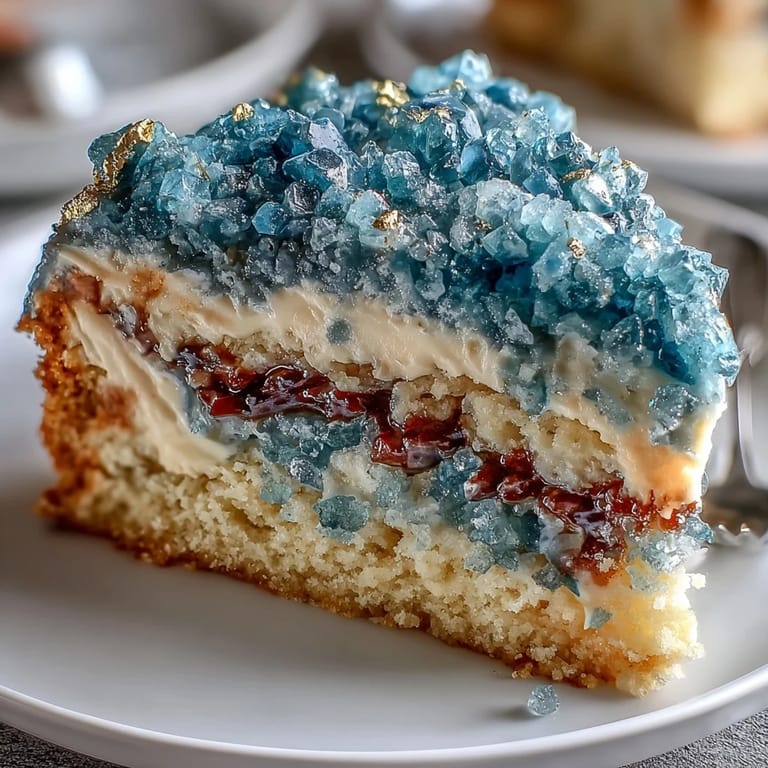
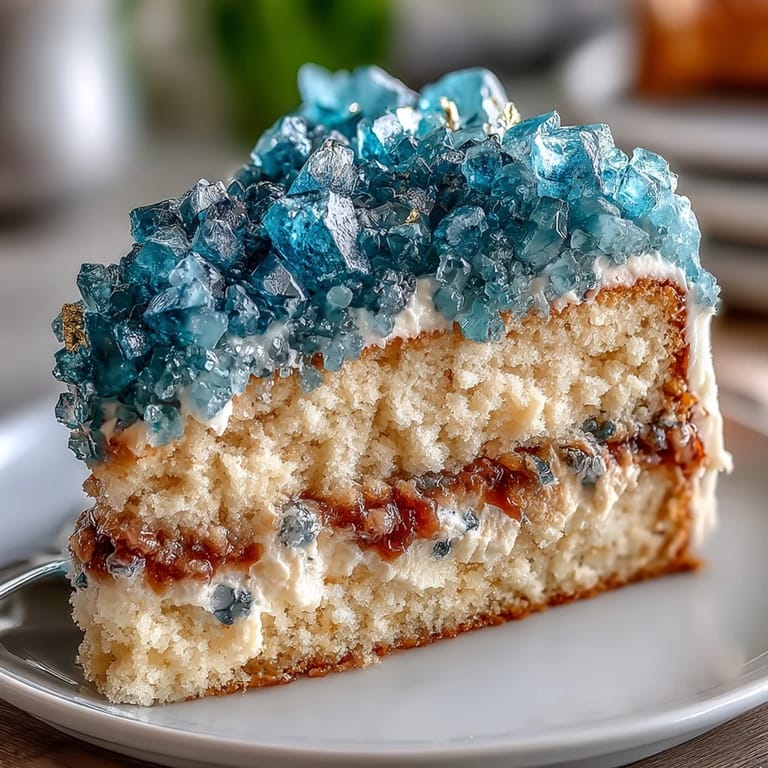
Save The first time I attempted a teal and gold geode cake was on a sunny afternoon with specks of rock sugar scattered across my kitchen counter, glittering under the light. I remember giggling at how the edible gold leaf stuck to my fingers as I tried to brush it onto the sugar crystals without getting it everywhere. There was something thrilling about carving out a slice of cake, only to fill the void with sparkling sweets—almost like uncovering a hidden gem. Baking for celebrations always makes the kitchen feel electric, but this design, bold and creative, pushed me to try new color combinations beyond my comfort zone. It was both artistic and delicious, and I found myself pausing just to admire the cake before slicing into it.
I made this cake for my cousin's graduation, where we crowded around the table, laughing as she tried to guess if the geode slice was real or edible. The kitchen smelled like vanilla and sweet buttercream, and the anticipation grew as I revealed the shimmering teal sugar crystals. Her friends snapped photos, but the biggest compliment was everyone asking for seconds—especially after they saw the gold shimmer catch the afternoon sun. That moment turned decorating from a quiet, solitary activity into a shared celebration. It taught me how even the quirkiest cake design can become the highlight of a milestone event.
Ingredients
- All-purpose flour: I always sift the flour to achieve a light, tender crumb, and it forms the sturdy base for carving the geode wedge.
- Baking powder: Gives the cake layers height and helps them rise evenly, making decoration easier and more striking.
- Salt: Brings out the sweetness and balances the butter in both cake and buttercream.
- Unsalted butter: Room temperature butter ensures both cake and frosting whip up silky and smooth—don&apost skip this step.
- Granulated sugar: This sweetens the cake and helps achieve that golden crust on the layers.
- Eggs: Adding them one at a time makes the batter lush and stable; don&apost rush through.
- Vanilla extract: Don&apost underestimate the vanilla—it anchors the flavor, especially when paired with the geode decoration.
- Whole milk: Stable temperature and slow addition stop the batter from splitting; it gives richness to every slice.
- Powdered sugar: Sifted powdered sugar ensures a lump-free buttercream, which is key for that smooth, professional finish.
- Heavy cream or milk: The right amount transforms buttercream into a cloud, easy to spread and tint.
- Teal gel food coloring: A little goes a long way; gel coloring keeps the buttercream vivid without thinning it.
- Rock sugar crystals: They mimic actual geodes, and I learned to tint them gently and dry completely for a jewel-like look.
- Edible gold leaf or gold luster dust: These finishing touches make the geode shimmer and elevate the whole cake.
- Simple syrup: Just a quick brush keeps the cake layers extra moist and flavorful, especially after carving.
Tired of Takeout? 🥡
Get 10 meals you can make faster than delivery arrives. Seriously.
One email. No spam. Unsubscribe anytime.
Instructions
- Bake the Vanilla Cake:
- Let&apost preheat the oven to 350°F and grease our cake pans thoroughly so nothing sticks. Whisk together the dry ingredients, then cream butter and sugar until fluffy before gradually mixing everything else in; listen for the slow mixer hum and watch the batter turn silky.
- Prepare the Buttercream:
- Beat the butter until it&apost smooth, then slowly add powdered sugar so it doesn&apost cloud the kitchen. Add vanilla and just enough cream to reach a spreadable consistency; tint most of it a rich teal, leaving some plain for the crumb coat.
- Tint Sugar Crystals:
- Add a few drops of teal gel coloring to the rock sugar and gently mix; don&apost overdo it or they&apost stick together. Spread them on parchment and leave to dry so they stay sparkly when pressed into the cake.
- Assemble the Cake Layers:
- Level and brush layers with simple syrup for extra moisture. Stack them with buttercream, do a quick crumb coat with uncolored buttercream, then chill the cake before frosting all over with teal buttercream.
- Carve and Create Geode Slice:
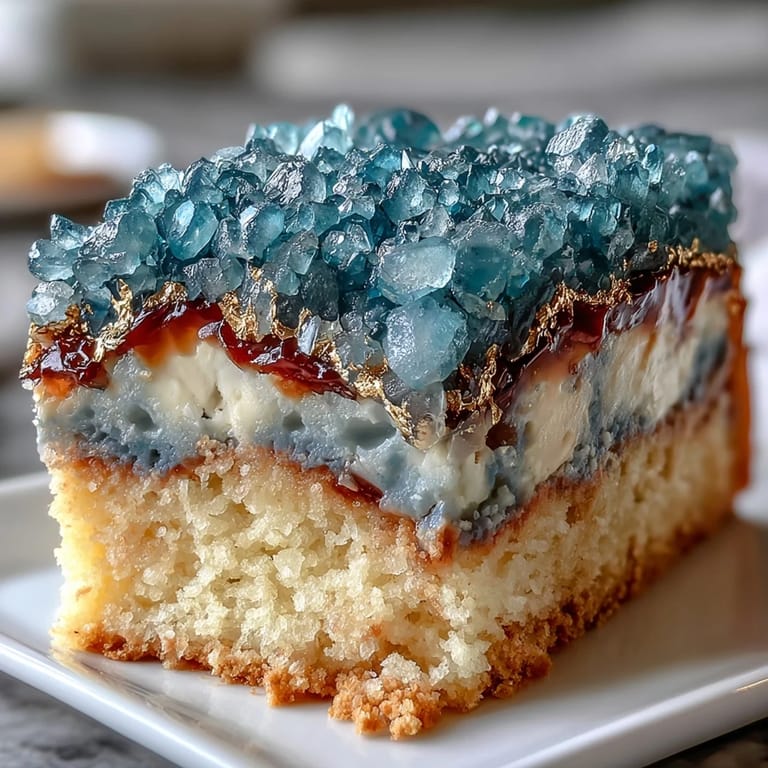
- Using a serrated knife, carve a wedge or slice into the side, then cover it with buttercream. Press in sugar crystals, using lighter in the center and darker on the edge for depth, then carefully paint the edges with gold leaf or luster dust to add sparkle.
- Add Final Touches:
- Finish the cake with more gold accents and place your graduation topper if you like. Step back and take a moment to appreciate your edible work of art before slicing and serving.
 Save
Save When I brought out the finished geode cake at the graduation party, someone gasped, "Is that real?" It felt like the cake had transformed into a celebration centerpiece, and for a moment, all eyes were on the shimmering slice—turning simple baking into a shared moment worth savoring.
Making the Perfect Teal Shade
Gel food coloring can sometimes surprise you, so mix in just a small amount and adjust drop by drop. I found blending in a touch of blue made the teal pop without overpowering the cake&apost look, especially when paired with gold details.
Carving the Geode Slice Smoothly
A serrated knife offers the best control for carving the slice without crumbling the cake. Take your time and use an offset spatula to apply buttercream inside the wedge for an even base before adding sugar crystals.
Decorating Like a Pro (Even If You&apost Not)
Gold leaf can be tricky, so use a clean, food-safe brush to carefully dab it onto the edge of the geode. Keep parchment paper handy for catching stray bits, and don&apost worry if your geode shape ends up quirky—every slice is unique.
- Check that the sugar crystals are dry and don&apost melt into the buttercream.
- Use your hands to gently press the crystals—don&apost force them or they&apost break.
- Quickly clean up edible gold spills with a damp paper towel before they stick.
 Save
Save Whether you&apost celebrating with friends or admiring your own handiwork, this cake promises sparkle and smiles. Enjoy each slice—there&apost nothing quite like baking a showstopper that&apost as fun to decorate as it is to eat.
Recipe FAQs
- → What gives the geode effect its vibrant color?
Teal gel food coloring is mixed with rock sugar crystals to create vivid hues and realistic geode patterns.
- → How do you achieve the gold accents?
Edible gold leaf or gold luster dust is painted onto the edges of the geode section using a food-safe brush and clear alcohol.
- → Can the vanilla cake base be flavored differently?
Yes, lemon or almond extract can be substituted for vanilla, adding extra depth and flavor to the base.
- → What tools make assembling the cake easier?
An electric mixer, offset spatula, serrated cake knife, parchment paper, and food-safe paintbrush all streamline assembly and decorating.
- → Is the cake suitable for vegetarians?
Yes, all ingredients are vegetarian-friendly, though those with allergies should check labels for possible nut traces.
- → How many servings does the cake provide?
The finished cake yields approximately sixteen generous servings, ideal for gatherings and celebrations.