 Save
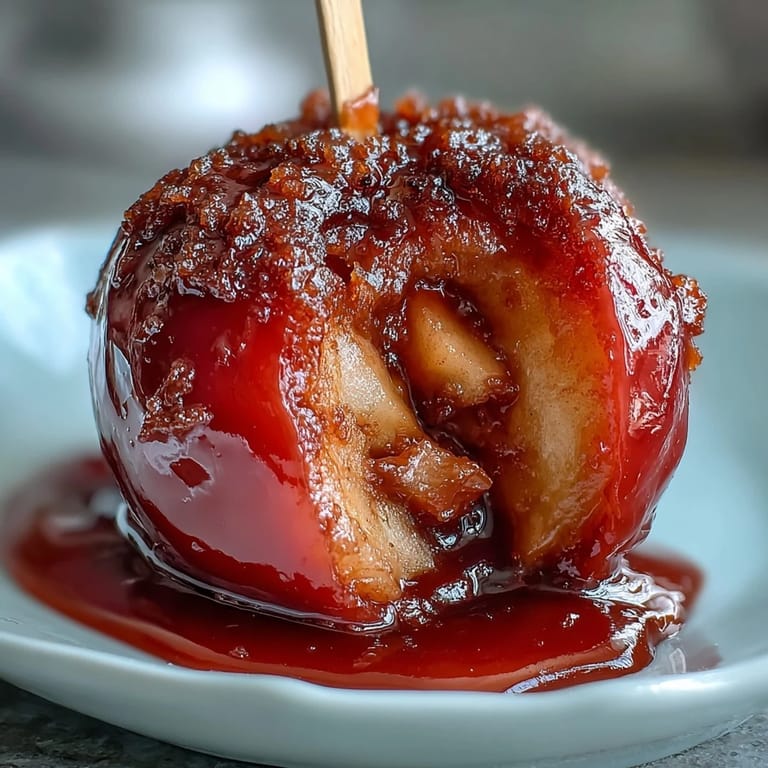
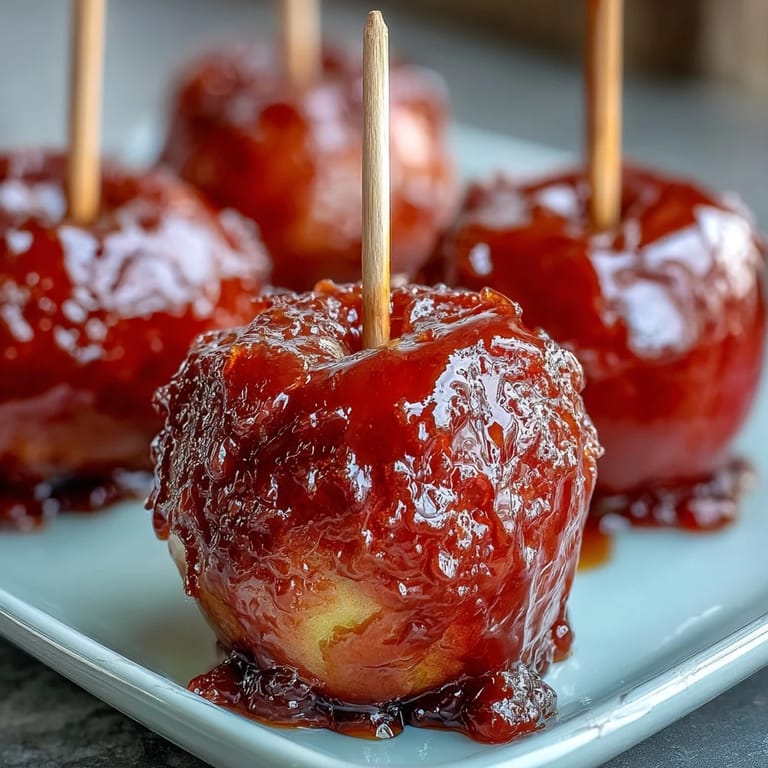
Save My neighbor showed up at my door with these glossy red apple bites on toothpicks, and I couldn't resist grabbing one. The candy shell cracked between my teeth with that satisfying snap, giving way to tart apple underneath, and I was instantly hooked. She laughed when I asked for the recipe, saying it looked fancy but was somehow the easiest thing she'd ever made. Now whenever I need to bring something to a gathering, these little gems are my secret weapon because they look like you spent hours in the kitchen when really you just spent 30 minutes.
I made these for my daughter's school potluck last fall, and they disappeared in minutes while the elaborate casseroles sat untouched. One mom actually followed me to my car asking for the recipe because her kids demanded them at home. That's when I realized these little bites had something special, that perfect balance of sophistication and fun that makes people actually remember what you brought.
Ingredients
- 2 large crisp apples (Granny Smith or Fuji): The tartness cuts through the sweetness perfectly, and you want ones that are firm so they don't fall apart on the toothpick.
- 1 cup granulated sugar: This is the backbone of your glossy coating, so don't skip quality here.
- 1/3 cup light corn syrup: This keeps the candy from crystallizing and gives it that glass-like shine that makes them look store-bought.
- 1/4 cup water: Just enough to get everything dissolving without making it syrupy.
- 1/4 teaspoon red food coloring: Adds that jewel-tone look, though green or pink work beautifully too.
- Nonstick cooking spray: Prevents the candy from sticking to your parchment like glue.
- Optional toppings (nuts, chocolate chips, sprinkles): These stick best when added immediately after dipping, so have them ready.
Tired of Takeout? 🥡
Get 10 meals you can make faster than delivery arrives. Seriously.
One email. No spam. Unsubscribe anytime.
Instructions
- Prep Your Stage:
- Line a tray with parchment paper and give it a light mist of nonstick spray, creating a non-stick canvas where your candy bites can cool undisturbed.
- Cut and Dry Your Apples:
- Core your apples and chop them into 1-inch chunks, then pat them completely dry with paper towels because any moisture is the enemy of candy adhesion. This is the moment where patience pays off.
- Arm Your Bites:
- Poke each apple chunk with a toothpick, giving yourself something to hold without burning your fingers later.
- Build Your Candy Base:
- Combine sugar, corn syrup, and water in a small saucepan, stirring just until everything is moistened before you turn up the heat. Once it reaches a boil, resist the urge to stir further because stirring can cause crystallization.
- Reach Hard Crack Stage:
- Let the mixture bubble away until a candy thermometer reads 300°F, about 7 to 8 minutes, and you'll notice it shifting from amber to a deeper golden color. The moment it hits temperature, pull it off the heat immediately.
- Add Your Color:
- Stir in your red food coloring quickly so it distributes evenly, watching the mixture transform into that jewel-like red that makes these so visually stunning.
- The Dipping Dance:
- Working fast because the candy hardens quickly, dip each apple chunk into the hot coating with a twisting motion, letting excess drip off before placing it on your prepared tray. If you want toppings, this is your 10-second window to sprinkle them on before everything sets.
- Cool with Patience:
- Let them sit undisturbed at room temperature until completely hardened, usually about 30 minutes, and resist peeking because the candy needs time to transform from liquid to that snappy shell.
 Save
Save My kitchen smelled like caramel and cinnamon apples that afternoon, and somehow those little red bites became the thing my family requests before birthdays and gatherings. My son ate three in a row and declared them better than any candy store version, which felt like winning the kitchen lottery.
The Temperature Trick That Changes Everything
I used to eyeball the candy stage like my grandmother did, but honestly that's how I ended up with sticky candy that never hardened properly. The moment I started using a candy thermometer and actually paid attention to 300°F, everything clicked into place. Those few degrees make the difference between a satisfying snap and a chewy disappointment that sticks to your teeth.
Timing Your Toppings for Maximum Stick
The secret that took me three batches to figure out is that toppings only stick if you add them within about 10 seconds of the apple hitting the tray. Wait too long and the candy hardens into a glossy shield that nothing can stick to, so I now have my toppings in little bowls ready to go before I even start heating the sugar. It sounds fussy, but it literally takes an extra 30 seconds of preparation.
Storage and Serving Ideas
These keep beautifully for a few days in an airtight container, though they're honestly best eaten within 24 hours when the candy is at peak crispness. I've started wrapping them individually in cellophane bags with a ribbon for gifting, and people genuinely think I spent hours on them.
- Store in an airtight container away from humidity, which is candy's biggest enemy.
- Serve them cold straight from the fridge if you want extra-crispy candy shells that snap loudly.
- These are naturally vegetarian and gluten-free, making them perfect for guests with dietary restrictions.
 Save
Save These candy apple bites taught me that sometimes the most impressive dishes are the ones that require the least fussing, and that perfect balance of simplicity and elegance is worth sharing with everyone you know. Grab a toothpick and taste why these have become my go-to whenever I want to make someone smile.
Recipe FAQs
- → What type of apples work best for these bites?
Crisp apples like Granny Smith or Fuji are ideal, offering a tart and firm texture that contrasts well with the candy coating.
- → How do I ensure the candy coating adheres properly?
Make sure the apple chunks are thoroughly dried before dipping to help the hot candy stick evenly without sliding off.
- → What temperature should the candy coating reach?
The candy mixture needs to reach the hard crack stage at about 300°F (149°C) to develop a firm, crisp shell around the apple pieces.
- → Can I add toppings to the candy coating?
Yes, sprinkle options like chopped nuts, mini chocolate chips, or colorful sprinkles onto the candy before it hardens for added texture and flavor.
- → How should I cool the coated apple bites?
Allow the dipped apple pieces to cool and harden completely at room temperature on a prepared tray before serving to ensure the candy shell sets properly.
- → Are toothpicks necessary for serving?
Toothpicks or small skewers make handling the bite-sized apples easier and provide a convenient way to serve them at parties or gatherings.