 Save
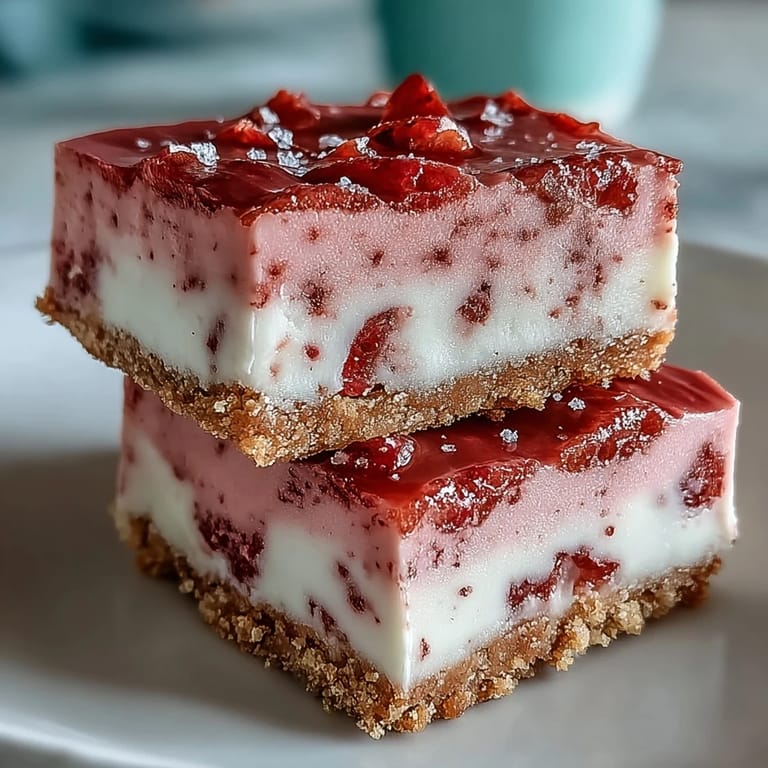
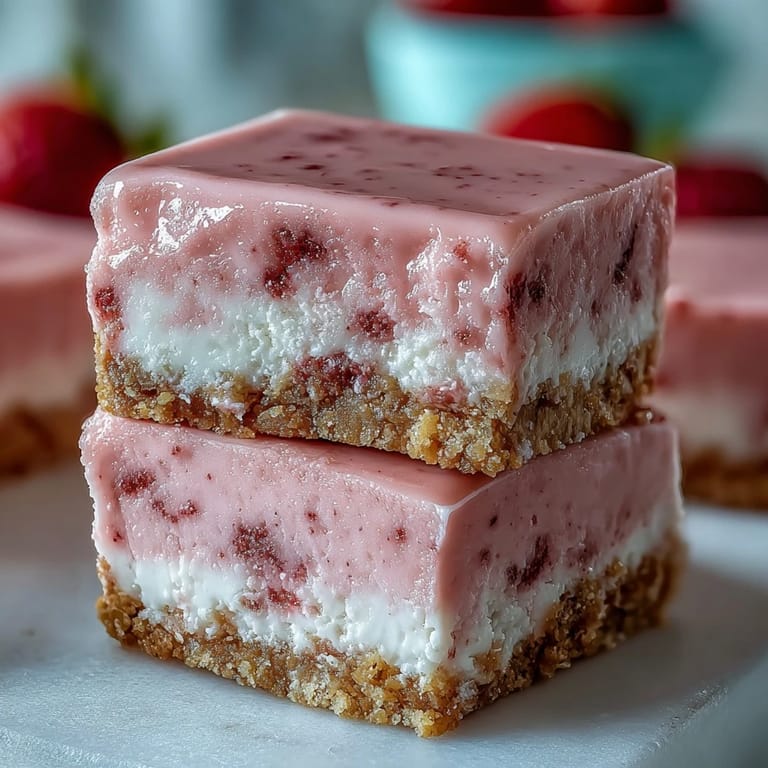
Save A friend brought freeze-dried strawberries to a potluck swap, insisting they were the secret to year-round berry flavor without the watery mess. I was skeptical until I folded that bright pink powder into melted white chocolate and watched it bloom into something that tasted like summer condensed into fudge. These squares became my go-to whenever I needed a dessert that looked impressive but required zero oven time. The crust presses together in seconds, the fudge sets while you catch up on laundry, and the color alone makes people smile before they even take a bite. It's one of those recipes that feels like a small magic trick every single time.
I made these for a baby shower once, cutting them into tiny rectangles and stacking them on a white platter. The mom-to-be kept circling back to the dessert table, and by the end of the afternoon she'd asked for the recipe three times. She later told me she made them for her hospital bag snack stash, which still makes me laugh. There's something about the creamy-crunchy contrast that hits differently when you're craving something sweet but substantial. I've since made them for book clubs, bake sales, and one memorable road trip where they survived four hours in a cooler and still tasted perfect.
Ingredients
- Digestive biscuits or graham crackers: The sandy, slightly sweet base that holds everything together and adds that essential crunch beneath the fudge, crush them fine so the crust packs tightly.
- Unsalted butter: Melted and mixed with the crumbs to create a press-in crust that firms up beautifully in the fridge without baking.
- White chocolate chips: The creamy foundation of the fudge layer, make sure to use real white chocolate with cocoa butter, not coating wafers, for the best melt and flavor.
- Sweetened condensed milk: Adds silky sweetness and body, turning the melted chocolate into a spreadable fudge that sets firm but never rock-hard.
- Freeze-dried strawberries: Ground into powder, they deliver concentrated berry flavor and that gorgeous pink hue without adding liquid that would soften the fudge.
- Pure vanilla extract: A quiet background note that rounds out the sweetness and makes the strawberry flavor taste more complex.
- Pinch of salt: Balances the sugar and sharpens the fruit flavor so the squares don't taste flat or one-dimensional.
- Pink or red gel food coloring: Optional, but a drop or two deepens the color if your strawberries are pale or you want that candy-shop brightness.
Tired of Takeout? 🥡
Get 10 meals you can make faster than delivery arrives. Seriously.
One email. No spam. Unsubscribe anytime.
Instructions
- Prep the Pan:
- Line your square baking pan with parchment paper, letting it hang over two opposite edges like handles. This makes lifting the finished fudge out a breeze and prevents any sticking.
- Build the Crust:
- Toss crushed biscuits with melted butter until every crumb is coated and the mixture clumps when you squeeze it. Press it firmly and evenly into the pan, then chill for 10 minutes so it sets and won't shift when you add the fudge.
- Melt the Chocolate:
- Set a heatproof bowl over a pan of barely simmering water and add white chocolate chips and condensed milk. Stir gently and steadily until everything melts into a glossy, unified pool with no lumps.
- Flavor and Color:
- Remove the bowl from heat and stir in strawberry powder, vanilla, salt, and food coloring if using. Mix thoroughly until the color is even and the powder is completely dissolved with no streaks.
- Assemble:
- Pour the pink fudge mixture over the chilled crust and spread it to the edges with a spatula. Smooth the top gently so it looks neat and even.
- Chill and Set:
- Cover the pan loosely with plastic wrap and refrigerate for at least 2 to 3 hours. The fudge should feel firm when you press it lightly, not tacky or soft.
- Slice and Serve:
- Lift the whole slab out using the parchment overhang, set it on a cutting board, and slice into 16 squares with a sharp knife. Wipe the blade between cuts for clean edges, then garnish with fresh or freeze-dried strawberry pieces if you like.
 Save
Save My neighbor once asked if I could make these nut-free for her daughter's class party, and I realized the recipe was already naturally free of nuts. She came back the next week saying the kids called them princess squares and kept asking when they'd come back. That little moment reminded me that sometimes the simplest recipes, the ones that don't require fancy skills or hard-to-find ingredients, are the ones that stick in people's memories. These pink squares have shown up at more celebrations in my circle than I can count, and every time someone asks for the recipe I feel a little flutter of pride that something so easy can make people so happy.
Choosing Your Strawberry Base
Freeze-dried strawberries are my preferred choice because they grind into a fine, shelf-stable powder that won't add moisture or change the fudge's texture. You can find them in the snack aisle or bulk bins at most grocery stores, and a coffee grinder or spice grinder turns them into powder in seconds. If you only have fresh strawberries, puree them smooth, press through a fine-mesh sieve to remove seeds, then simmer the puree in a small pan until it reduces by half and thickens to a jam-like consistency. This extra step is worth it to avoid a runny fudge layer. Either way, taste your strawberry component before adding it, if it's very tart you might want to stir in an extra teaspoon of condensed milk to balance the flavor.
Make-Ahead and Storage Tips
These squares keep beautifully in the fridge for up to five days, stacked in an airtight container with parchment between layers so they don't stick. I've even frozen them for up to a month, thawing in the fridge overnight before serving, and they come back just as creamy and bright. If you're making them for a party, cut them the morning of and store covered, then let them sit at room temperature for about 10 minutes before serving so the fudge softens just enough to feel luxurious on the tongue. They also travel well in a cooler, which is how they survived that road trip and made me a hero at the rest stop picnic.
Flavor Twists and Variations
Once you've mastered the base, you can spin this recipe in a dozen directions. Swap the strawberry powder for freeze-dried raspberries or a mix of both for a deeper berry flavor, or fold in a spoonful of lemon zest for a strawberry-lemonade vibe. I've stirred mini white chocolate chips into the fudge layer for extra texture, and I've seen friends swirl in a ribbon of raspberry jam before chilling for a marbled effect. You can also press crushed freeze-dried strawberries into the top of the fudge right after spreading it, so they stick and add a little crunch and visual pop.
- Try a chocolate cookie crust using crushed Oreos with the cream scraped out for a cookies-and-cream twist.
- Add a tablespoon of cream cheese to the fudge mixture for extra tanginess and a cheesecake-like richness.
- Drizzle melted dark chocolate over the tops of the finished squares for a sophisticated contrast to the sweet pink fudge.
 Save
Save Every time I pull these pink squares out of the fridge and watch someone's face light up, I'm reminded that dessert doesn't have to be complicated to feel special. Keep a bag of freeze-dried berries in your pantry, and you'll always be 20 minutes of hands-on work away from something that tastes like a celebration.
Recipe FAQs
- → Can I use fresh strawberries instead of freeze-dried?
Yes, you can use 100 g of fresh strawberries that have been puréed and strained. However, freeze-dried strawberries provide a more concentrated flavor and vibrant color without adding extra moisture to the fudge.
- → How long do these squares need to chill?
The fudge layer needs at least 2–3 hours in the refrigerator to set properly. For best results, chill until firm to the touch before slicing into squares.
- → Can I make these dairy-free?
Absolutely! Substitute dairy-free white chocolate and coconut condensed milk for the traditional ingredients. The texture and flavor will remain delicious while accommodating dairy-free diets.
- → What's the best way to cut clean squares?
Use a sharp knife and wipe the blade clean with a damp cloth between each cut. This prevents the fudge from dragging and ensures neat, professional-looking squares.
- → How should I store leftover squares?
Store in an airtight container in the refrigerator for up to 5 days. Let them sit at room temperature for about 10 minutes before serving for a softer, creamier texture.
- → Can I adjust the strawberry flavor intensity?
Yes, simply vary the amount of freeze-dried strawberries to your taste. Start with the recommended 50 g and add more for a stronger strawberry flavor, or reduce slightly for a milder taste.